...
Navigate to the Jira issue where you want to upload and connect files
Open the SharePoint Files panel and click on “Connect”


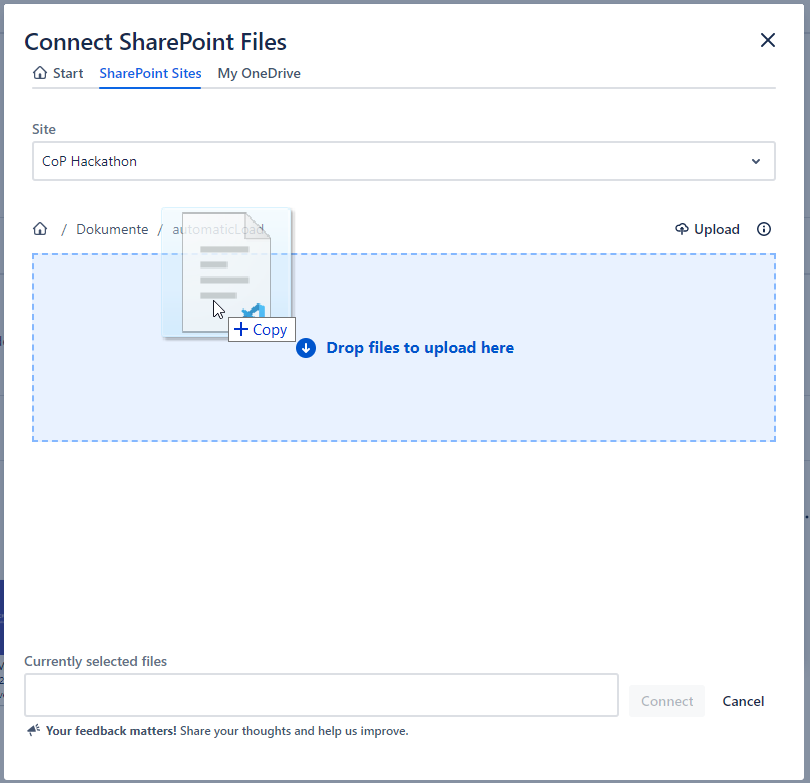
Navigate to the SharePoint Sites tab and select a Site.
Navigate to the location you want to upload the files.

There are two ways to upload files.
Clicking the “Upload” button on the right upper corner.
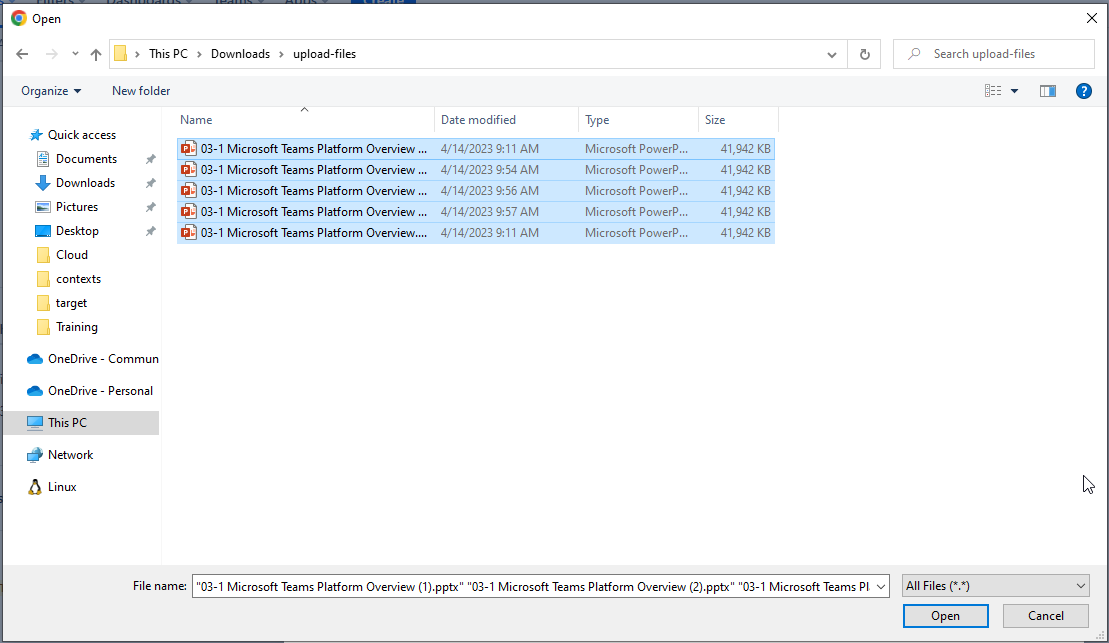
A dialog opens where you can select the files you want to connect and upload
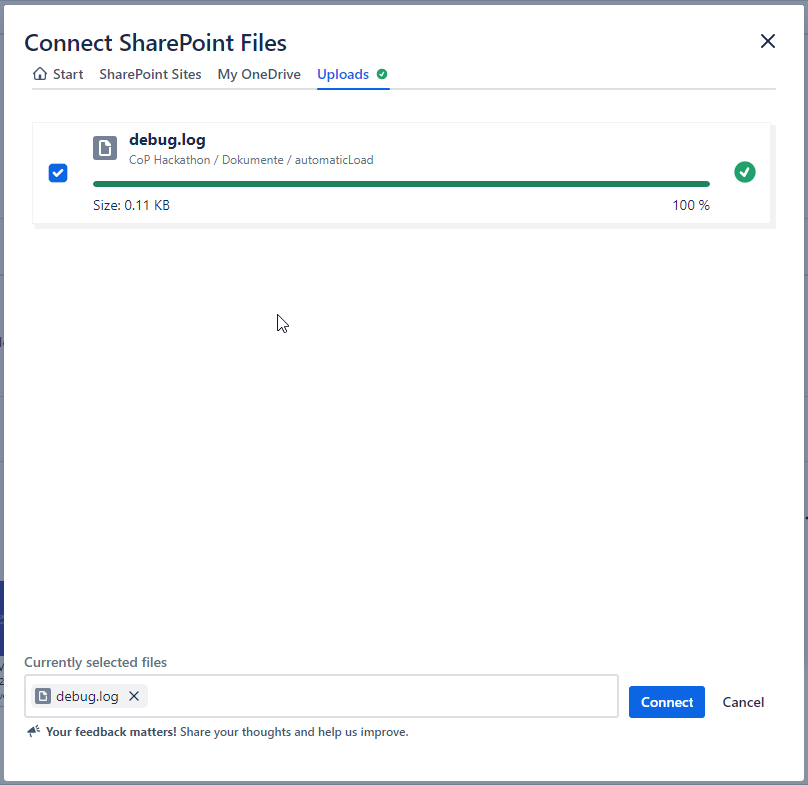
A new tab “Uploads” appears in the dialog where you can track the progress of the files being uploaded
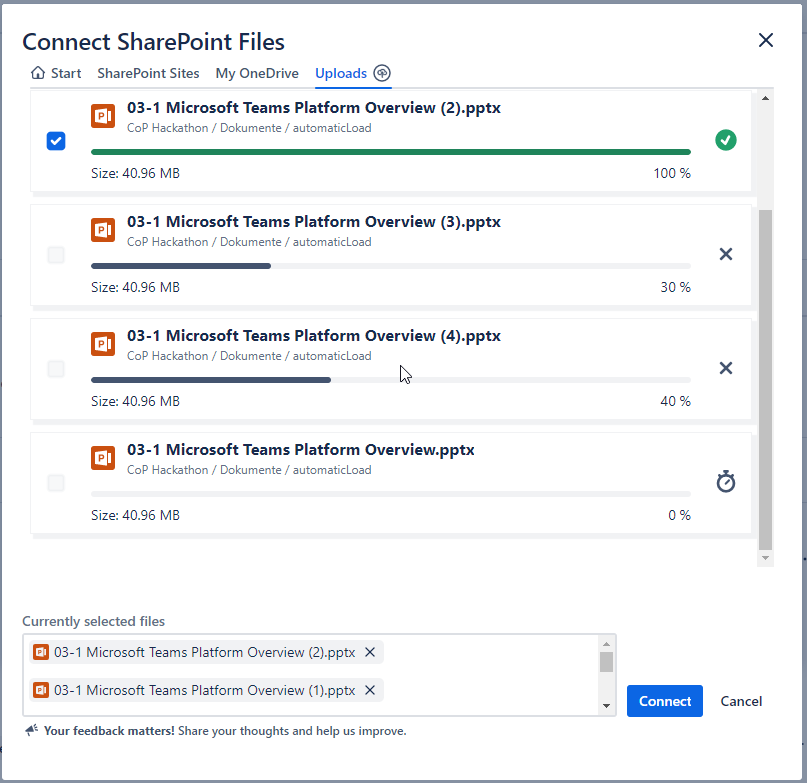
Once uploads have finished, the files are already selected and appear in the “Currently selected files” section on the bottom. If you don’t want to connect all the files you uploaded you can deselect them individually by clicking on the “X” icon.
Clicking on “Connect” button will connect all uploaded and selected files to the Jira issue

Drag & drop files on the table header
Navigate to the desired location (select the Site and location)
Drag & drop the files from your pc to the highlighted dropzone
Same as before an “Uploads” tab will appear where you can track the status of the file z
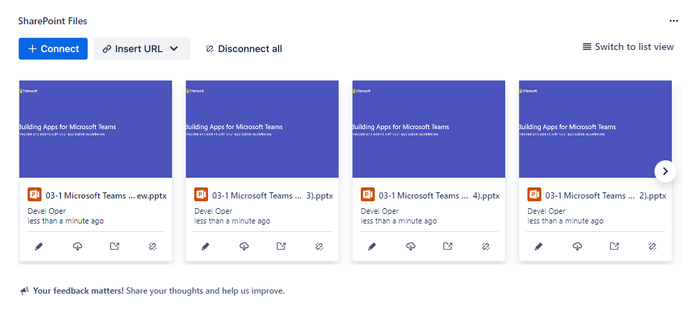
After clicking on “Connect” button the uploaded files will show in the “SharePoint Files” panel of the Jira issue
...