The Contact person macro displays contact information of a Microsoft 365 user.
Adding the contact person macro to a page
You can add our contact person macro just as any other macro to a page in Confluence. To be able to select a Microsoft user profile, you have to be logged in into your Microsoft account. Therefore the edit dialog checks first, if that is the case. If you are not logged in, you are asked to do so with a dialog which should look like this:

Image 1: Login edit mode
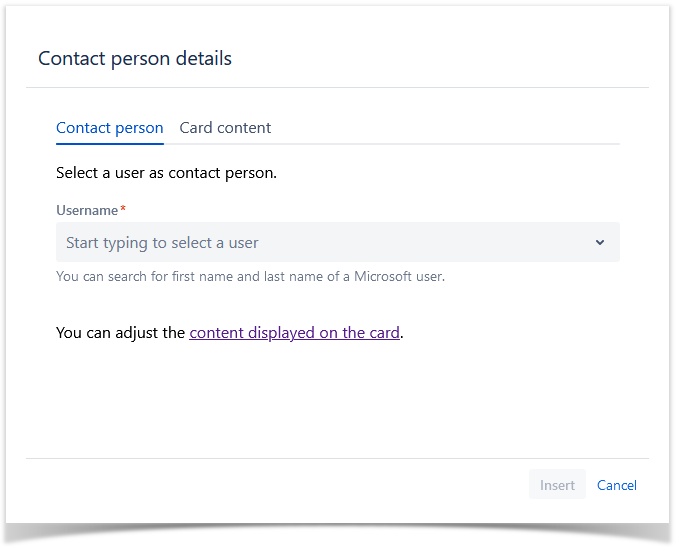
Afterwards you can select a user by typing his first or last name. If you are unsure about the first or last name of a person, just start typing a few letters and our solution will provide you some contact suggestions.

Image 2: Microsoft user picker
Optionally, you can customize the contact card's content. This allows you to define which contact-related information is most relevant to the company and should be displayed.
By default, all information is set to be displayed.
1. Access the "Card Content" Tab
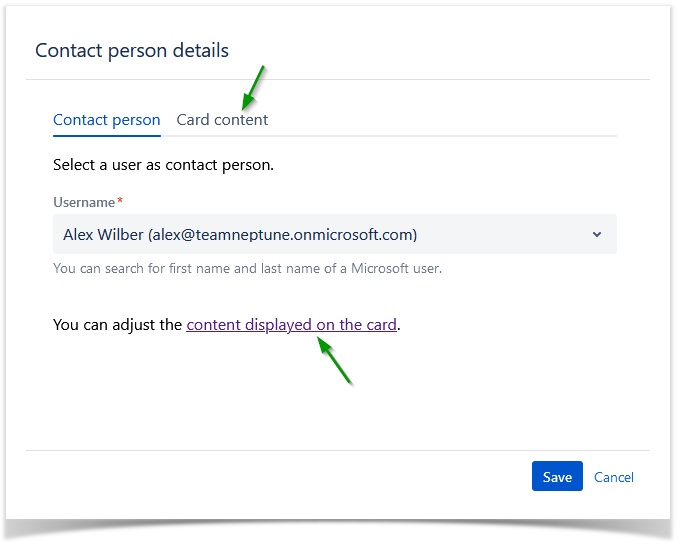
In the macro edit mode, navigate to this tab (or, alternatively, click on the appropriate link displayed on the "Contact person" tab):

Image 3: Navigate to Card Content tab
2. Select which information should be displayed
Each user information has an associated toggle. Click on the toggle of the information you want to hide or show:

Image 4: Card Content tab
3. Save and Preview
Once you've adjusted the settings, hit the "Save" button. This will confirm your configurations and display the customized macro on your Confluence page.
Modifications can be made anytime by editing the macro and accessing the "Card Content" tab.
When viewing a page with the contact person macro, you see the information of the configured user like this:

Image 3: Contact person information
To be able to see this information, you also have to be signed in into your Microsoft 365 organization. If this is not the case, the macro will look like this:

Image 4: Login on macro
On the contact person macro you can see the following information:
- display name
- user image
- email
- business phone
- start a Microsoft Teams chat
- presence status of the user
The macro adapts to the available space within certain limits.

Image 5: Responsive contact person card
Back to Top