How to Get Started
- Almuth Boehme [Communardo]
- Duy N.
- Juela Zeneli
![]() This guide is interesting for you, if you just installed "Metadata for Confluence" or if you have a space without any metadata and you want to start using metadata. The guide explains the most important steps, but is not intended to be as complete and detailed as the User's and Administrator's Guide in our documentation.
This guide is interesting for you, if you just installed "Metadata for Confluence" or if you have a space without any metadata and you want to start using metadata. The guide explains the most important steps, but is not intended to be as complete and detailed as the User's and Administrator's Guide in our documentation.
To get started with Metadata you can experience how Metadata for Confluence works with the already configured demonstration space or you can start from scratch with your own metadata.
Get to Know Metadata with our Demo Case
SINCE VERSION 2.0
We have created a demo case to show you what our add-on can do and to present one of many use cases.
After installing the add-on, you can open the demonstration space by clicking "Spaces" > "Product Directory".
On the homepage of the space you will see a product directory. The overview is created using the Metadata Overview macro to display metadata of several pages which contain the same metadata set.
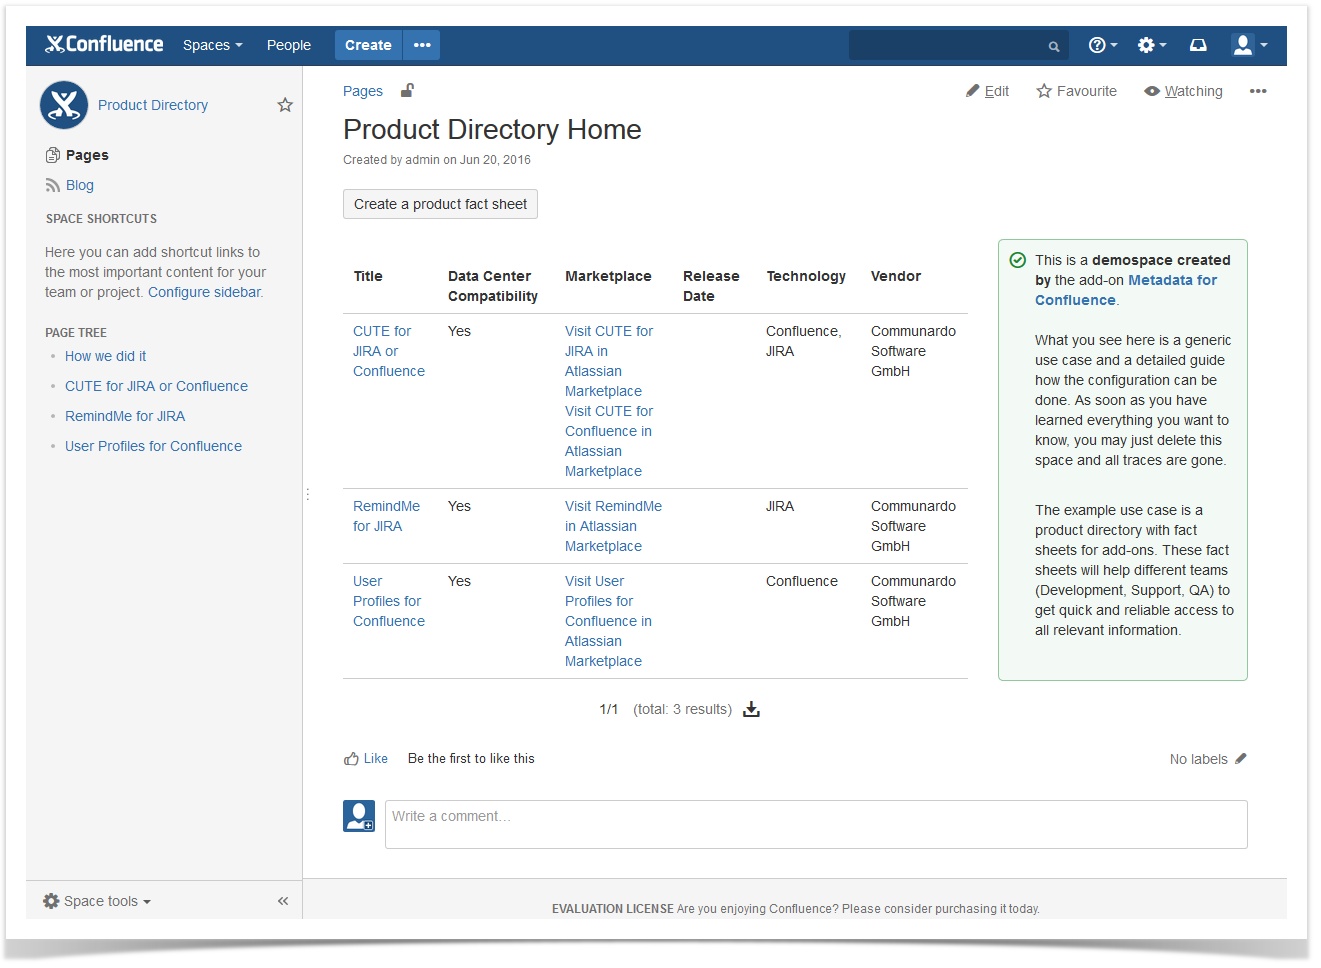
Image 1: "Product Directory" Homepage with Metadata Overview (click to enlarge)
You can edit the page and the Metadata Overview macro to check its configuration.
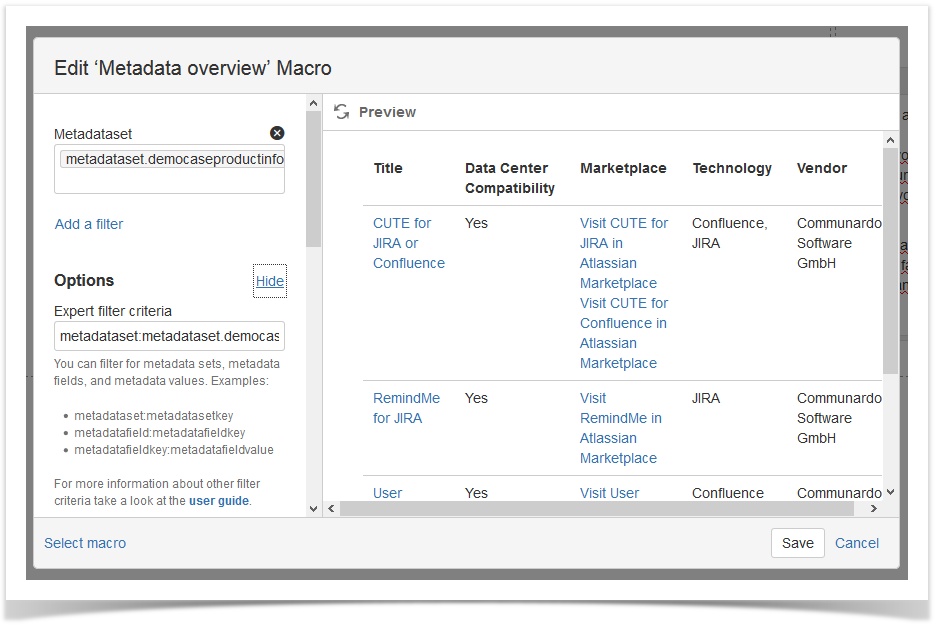 Image 2: Metadata Overview Macro - Configuration (click to enlarge)
To have a look at the configured metadata that is aggregated by the macro, open one of the child pages, e.g. CUTE for JIRA or Confluence, and click the colorful Metadata icon ![]() on the page.
on the page.
You will learn that the metadata set attached to this page is called "Product info". Its metadata fields and values are listed below (see image 3).
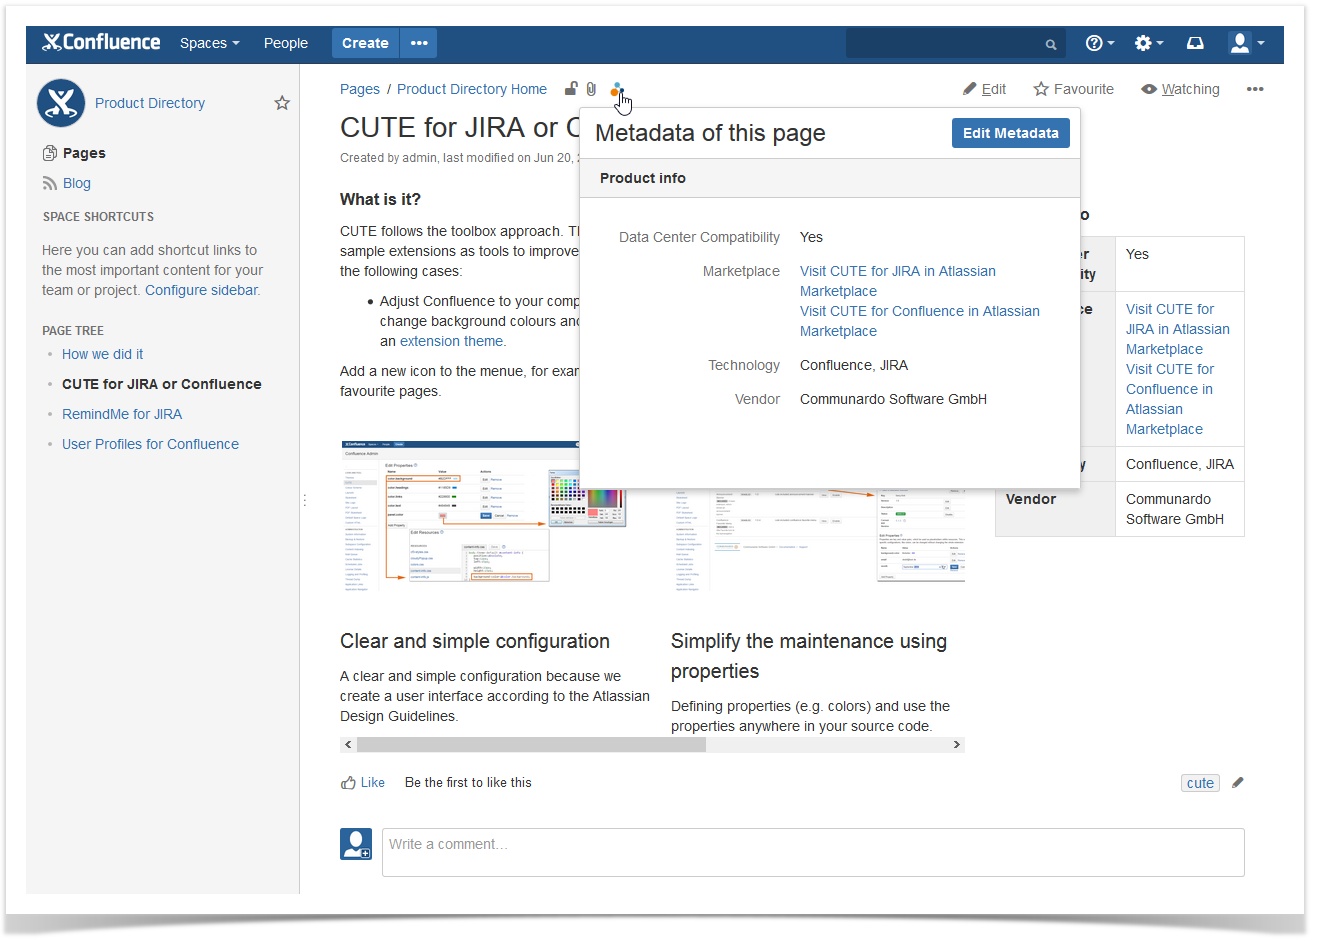 Image 3: View Metadata (click to enlarge)
You can edit the metadata values, by clicking the blue "Edit Metadata" button in the popup. This will lead you directly to the page edit view. Page metadata are already expanded and ready to be changed. Depending on the field type, you may get suggestions when typing.
The blue ![]() icon next to a metadata field name indicates that a description has been stored for this field. Click the icon to display the description.
icon next to a metadata field name indicates that a description has been stored for this field. Click the icon to display the description.
Additionally, you can see the Display Metadata macro at the top right (see image 4).
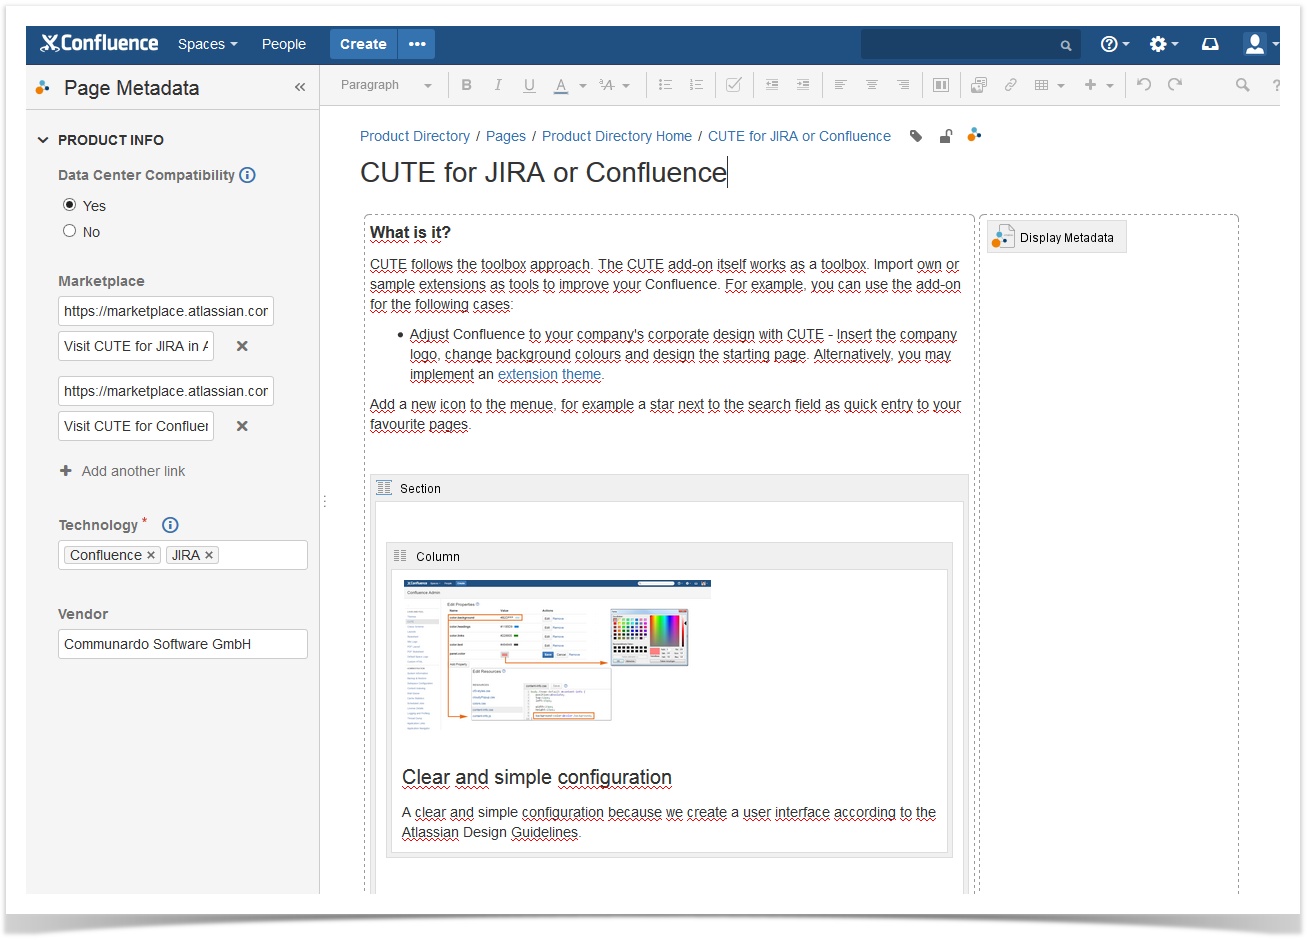 Image 4: Edit Metadata (click to enlarge)
When you edit the macro, its current settings are displayed. It is the metadata of the current Confluence page because we did not specify a different page.
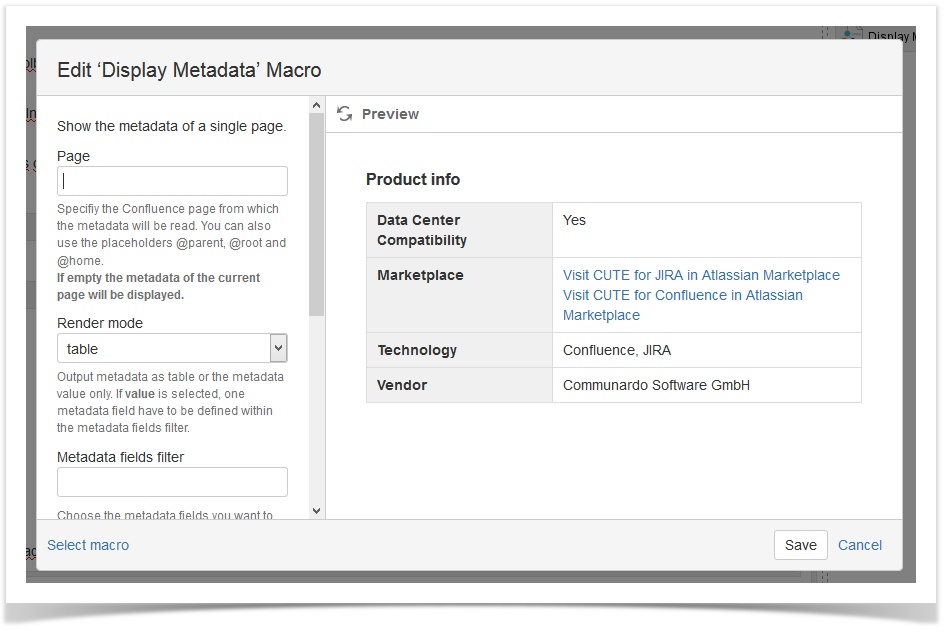 Image 5: Metadata Display Macro (click to enlarge)
Coming back to the homepage "Product Directory": When you click the button "Create a product fact sheet", a new page will be created based on the template "Product fact sheet". This page template is connected with a metadata set. This means every time a page is created with this specific template, the metadata set will be already connected to the page and metadata can be filled out immediately on creation.
To get detailed instructions for the metadata configuration of this demo case, check out the page How we did it in the demonstration space.
For detailed information on the Metadata for Confluence configuration in general, have a look at our documentation.
In the next section, we will show you how to set up your own metadata in a space.
Four Steps to Start from Scratch with your own Metadata in a Space
Examples used in this guide are inspired by the demonstration space "Product Directory".
1) Design
- Use pen and paper
 and jot down the metadata structure (Which kind of content should be described with metadata? For which cases should this content be used? Who will use the content? Which metadata is useful for that? How should the metadata look like? Is the metadata grouped?)
 - Example: We want fact sheets for the Communardo add-ons. These fact sheets will help different teams (Development, Support, QA) to get quick and reliable access to all important information. Our space "Product Directory" contains a page for every add-on. We need information like a contact person (a user in our system) and company (free text), a technology (which can be either Confluence, JIRA or Bitbucket), Marketplace links and the Data Center compatibility.
2) Create Metadata fields
- Use Confluence
 , in the Space Administration you can find a section "Metadata" and a button to add fields (see documentation)
 - Example: Create a field "Contact Person" with type "User" or "Text", create another field "Technology" with type "Multi Select" (Checkbox) and options (Confluence, JIRA, Bitbucket), create another field "Marketplace" with type "Link", lastly create another field "Data Center Compatibility" with type "Single Select (Radio Buttons)" and options (Yes, No).
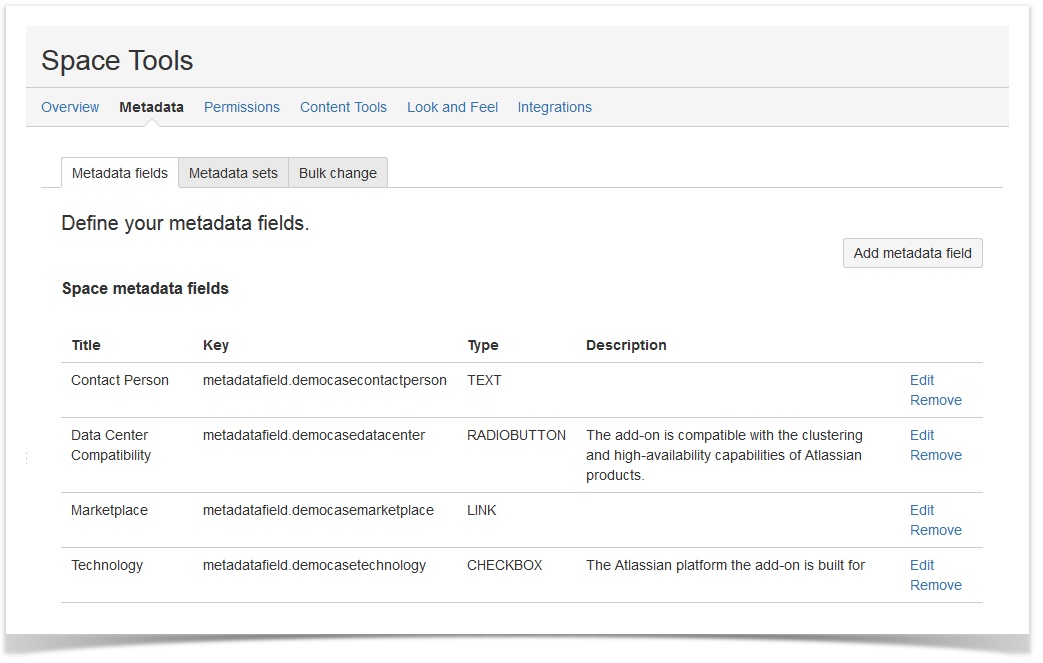 Image 6: Metadata Fields in Space Administration (click to enlarge)
3) Create a Metadata set
- Fields cannot be used without a set. A metadata set simply groups metadata fields together and makes adding metadata easier (see documentation)
- Example: Create a set "Product info" and add the aforementioned fields. Since the technology is very important information, we set this metadata field as required.
Additionally we connect the set with the page template "Product fact sheet", which has been created beforehand - as soon as a user creates a page based on that template, the metadata set is added to the page and the metadata has to be added by the user. All other pages in the space can still be created without metadata.
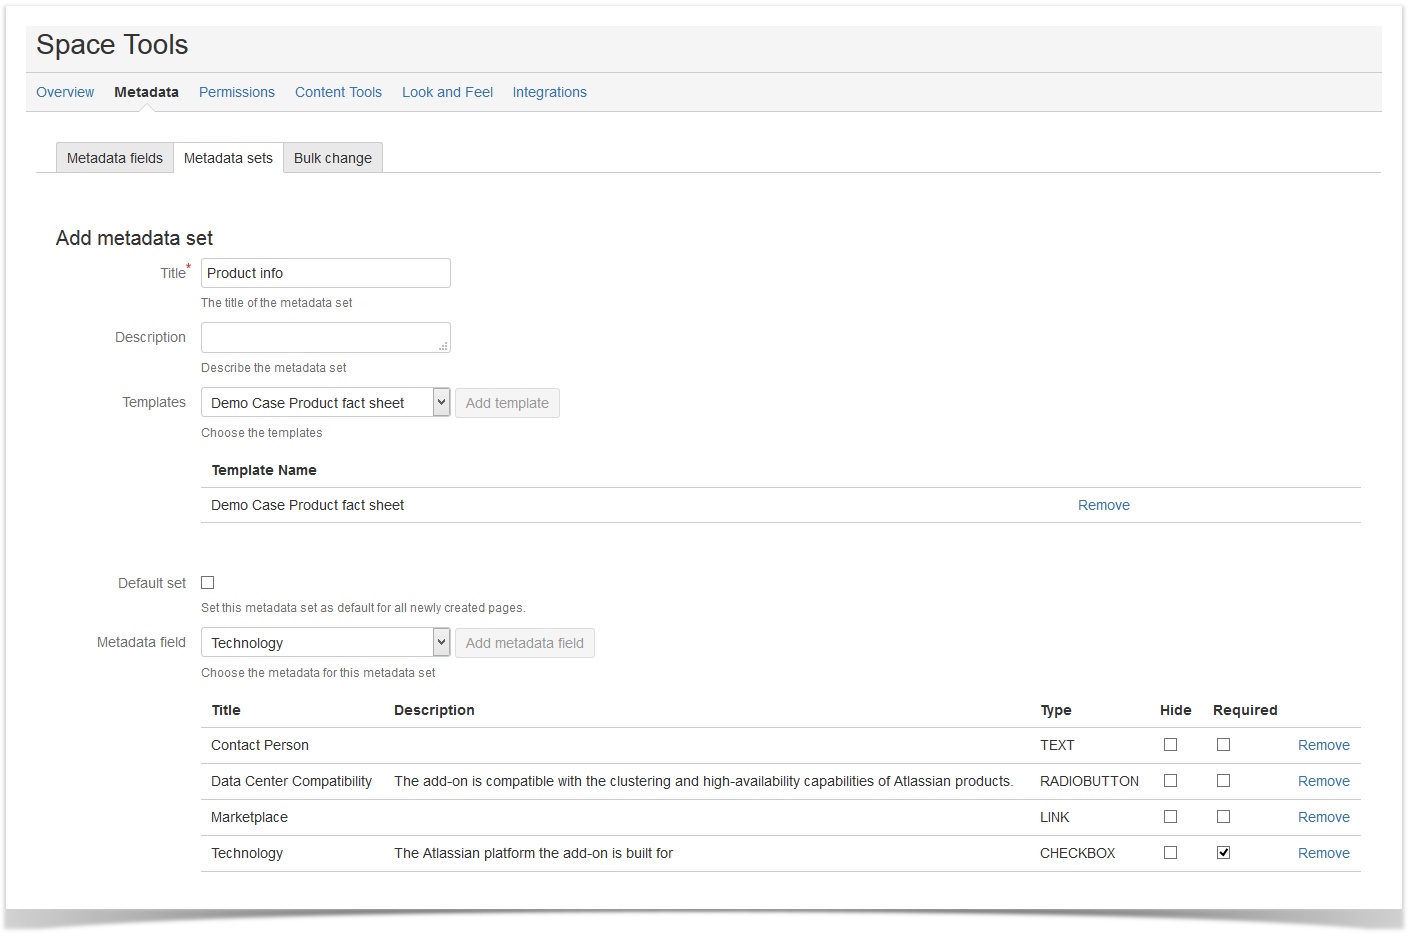 Image 7: Create Metadata Set (click to enlarge)
4) Use the Metadata
- Add the metadata to new or existing pages (see documentation) and use the macro "Display Metadata" to display the metadata of a single page (see documentation)
- Example: Create pages for the apps "CUTE for JIRA or Confluence", "RemindMe for JIRA" and "User Profiles for Confluence" based on the template "Product fact sheet" and enter the metadata.
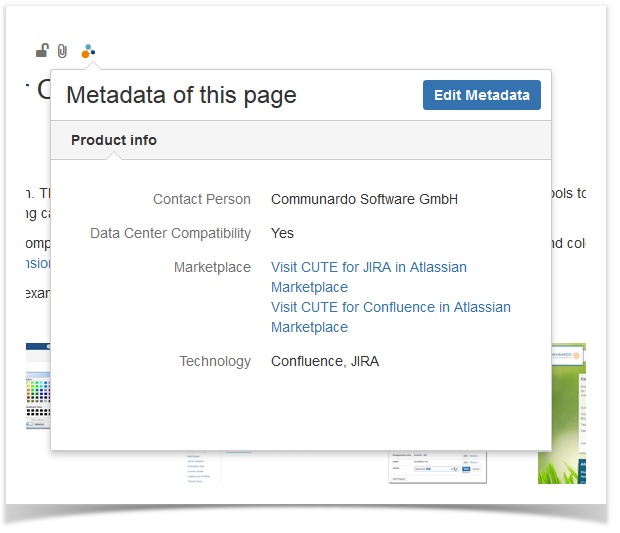 Image 8: View Metadata (click to enlarge)
- Use the macro "Metadata Overview" to show the metadata of several selected pages (see documentation)
Example: Let's create an app overview on the space homepage. All the magic happens in the parameter "Expert filter criteria (CQL)" of the macro "Metadata Overview" (click the link "Show" next to "Options"): metadataset=metadataset.productinfo shows all pages that have the metadata set "Product info".
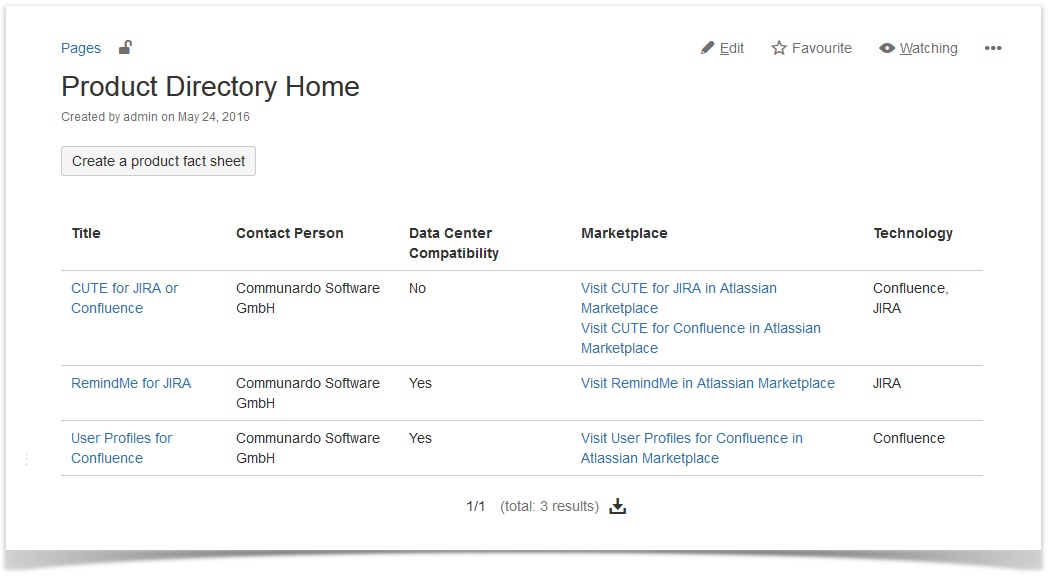 Image 9: Example Metadata Overview macro (click to enlarge)
- Advanced example: with a little modification you can also achieve personalization. An example could be that the apps overview should be automatically personalized with the technology the current user is responsible for. This means, if a user who is responsible for Confluence visits the overview, only Confluence apps will be shown and vice-versa. For this:
- Install app User Profile for Confluence and create a an enhanced user profile element named "Responsible for technology" with options "Confluence", "JIRA" and "Bitbucket" (see documentation for additional details).
- Let your users edit their profiles so that they can choose a suitable value for the new profile element "Responsible for technology".
- Remove the space Metadata field named "Technology" from Metadata set "Product info" and delete the field.
- Add a new Metadata field with name "Technology" to space "Product Directory". Select User Profile Element as type and choose "Responsible for technology" to link the user profile element with Metadata (more details about the integration can be found in User Profiles and Metadata Integration).
- Add the field to the "Product info" Metadata set of space "Product Directory" and select a matching value for the pages describing the apps.
- Change the value of the "Expert filter criteria (CQL)" for the macro Metadata Overview to: metadataset = metadataset.productinfo AND DEMOCASEPRODDIR.metadatafield.technology = "upc.currentUser"
- Now the macro will show all pages with Metadata set "Product Info" and with a value for the Metadata field "Technology" which matches the value of the profile element "Responsible for technology" of the current user.
Introductory Video
Have a look at our introductory video to learn how to get started with Metadata for Confluence.
| Metadata for Confluence |
|---|